At the end of part 1 I had a working spectrum implementation on a breadboard. I was delighted but looking for something permanent, so it was time to get soldering.
I used a soldering iron years ago (decades) and was never any good at it. But this time I have YouTube for tutelage so visited the excellent Mark Fixes Stuff channel for a look at how he does it. (https://www.youtube.com/@markfixesstuff)
I really had no idea! I wasn’t using a high enough temperature and was relying on the flux that was embedded in the solder. I could fix that with a proper soldering station and some flux. I also needed some isopropyl alcohol for cleaning everything afterwards. That stuff must be lethal as it was delivered from Amazon on its own by private car rather than from a van. Hmmm.
Before going on, let’s be completely clear: I am just starting out and have no idea what I’m doing. This isn’t a training manual and I’m not advising or recommending that anyone tries this.
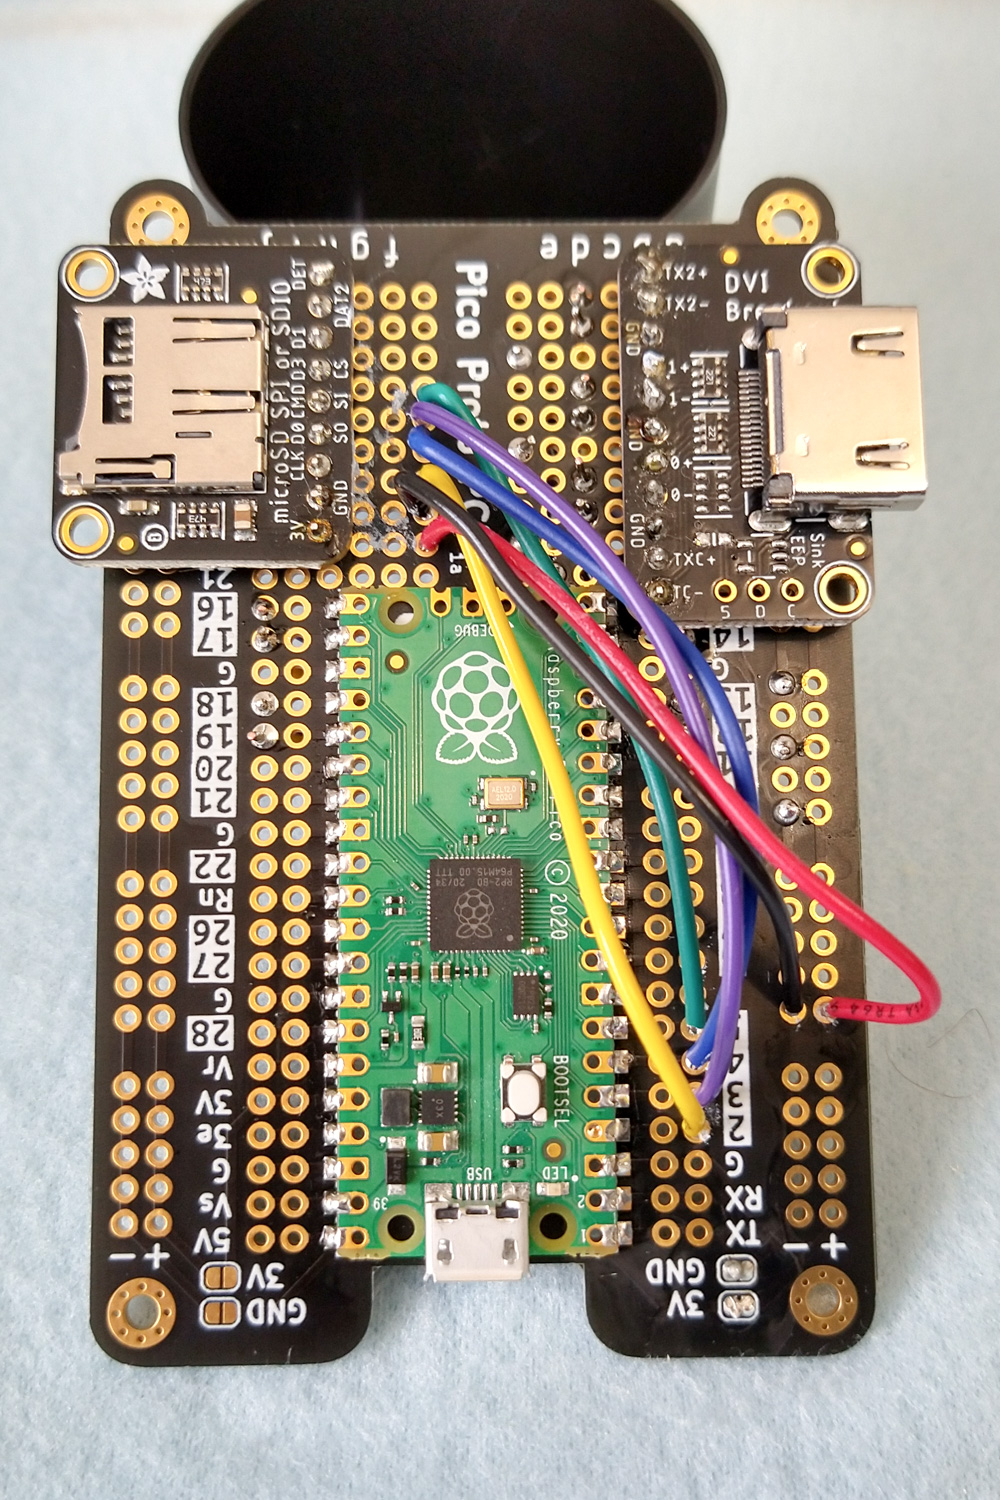
Hardware and some wiring connected.So with the right tools, some patience and some glasses for close work (yes, I’m old) I attached a Pico to a Pico Proto board and followed it up with an SD card holder and HDMI socket. There was just enough room for the components.
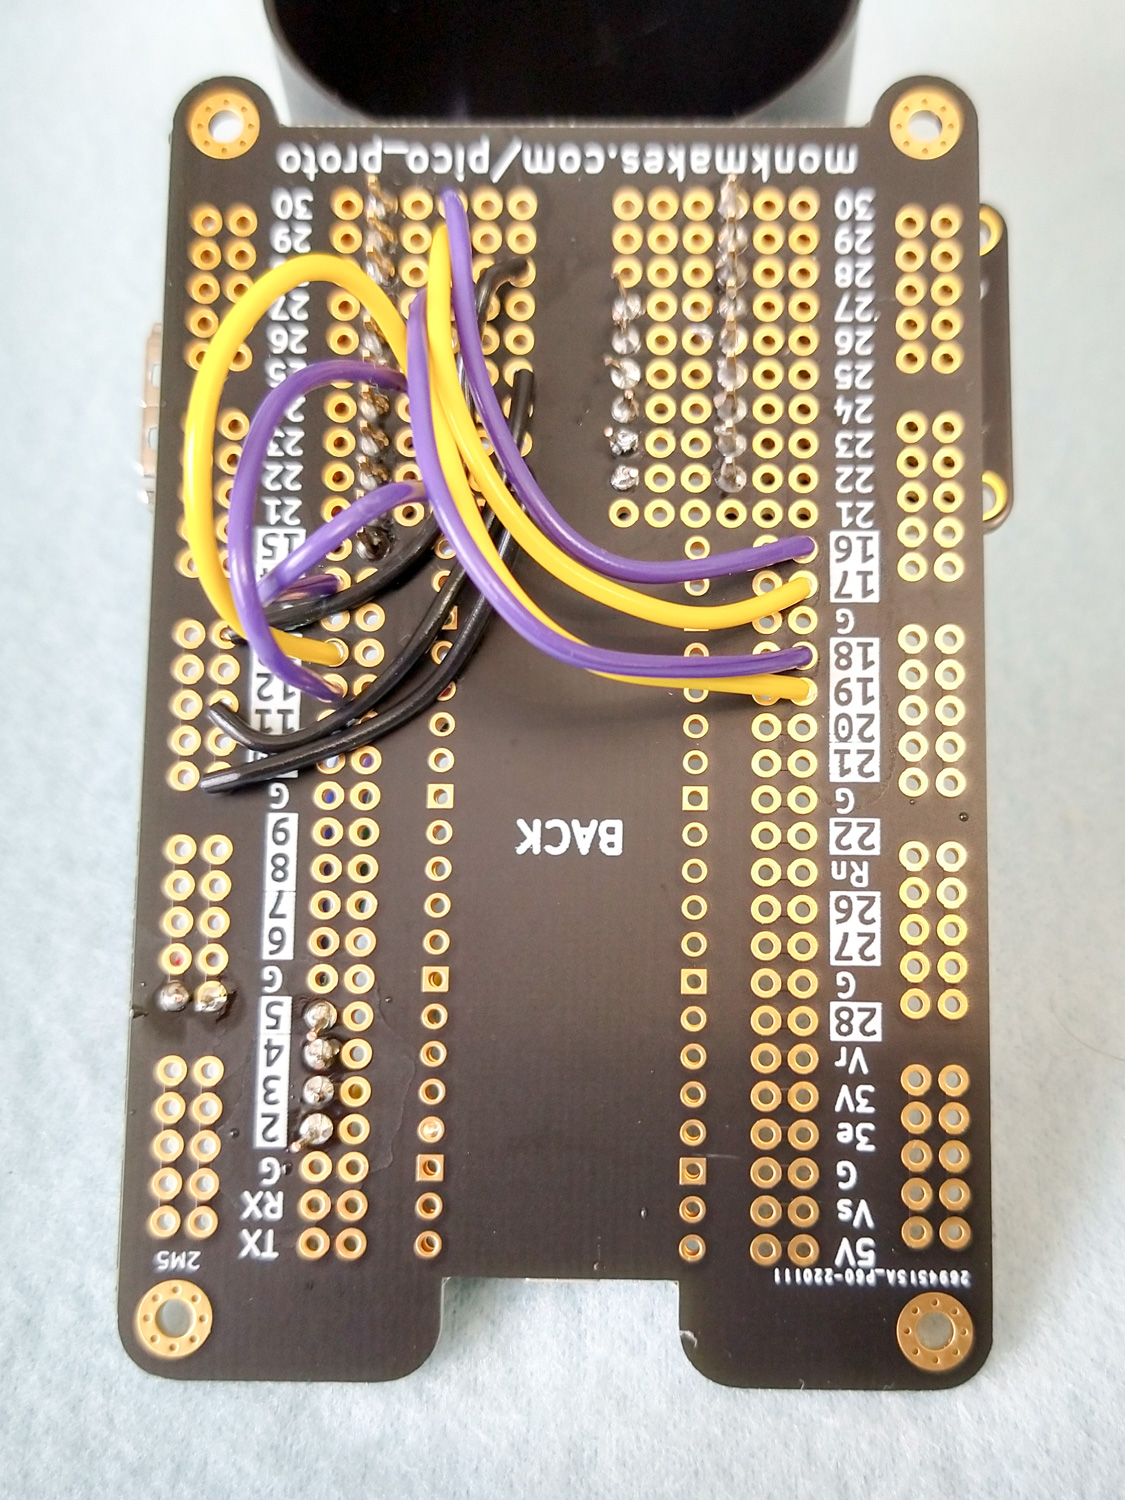
This is the flip side showing the extra wiring.As you may have seen in part 1 there was a lot of wiring, and this time I didn’t have the luxury of space to fit everything in, so I wired half on the top side and half underneath. Yes, that’s right, I didn’t think about putting the finished creation in a case where this could be a problem. Live and learn.
I still had one big problem: there was nowhere left to solder all of the audio circuitry and add a speaker or headphone socket. But that was a problem for another day (or indeed part 3).