Migrating the site to ReactJS (Part 2)
Published on: 13th March 2023
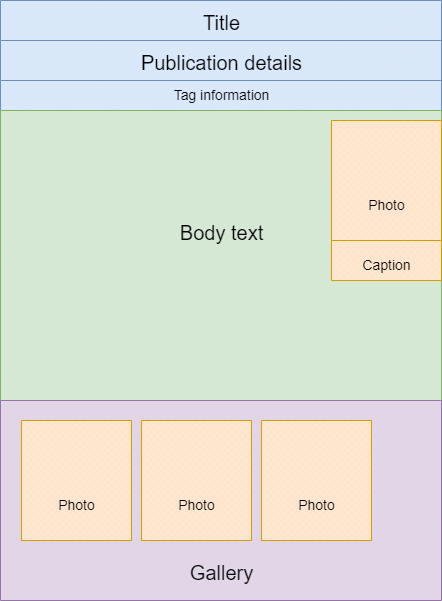
The common sense approach - my favourite kind of approach - seemed to be to make a single article first, splitting the various sections into reusable components. So what would I need?
- Information about the article (title, date created etc.)
- The text of the article
- The photos and their captions
- Tags
The article itself is going to be a text component (I need to work on component naming). I was also going to need a photo component for inline photos and a gallery component to group the photos together at the end. Three components seemed like plenty to be going along with.
Text
The big challenge was going to be turning some Markdown text into HTML without upsetting React. The function to render HTML is called dangerouslySetInnerHTML just in case there are any doubts about the risk. In this case the text is already created and saved (you’re reading some of it now) so the risk should be lower, but let’s not take any chances. The code grabs the article, tag and photo data from the server. Let’s not worry about how yet, we’ll come to that. The body of the article is then fed through DOMPurify to hopefully filter out any nasties. The results are then passed to ReactMarkdown and its rehypeRaw plugin to convert the text to presentable HTML. But I want to be able to do more than just show an image. I want to put it in its own card container and float it to the right of the screen. This is where rehypeRaw comes in handy. It is possible to specify a components object that maps regular HTML to custom JSX, such as:
{
	p: ({node, ...props}) => <div className='clearfix'><p {...props}></p></div>
}
This is just an example, and it’s worked with a handful of tags I’ve tried so far. It’s especially useful for handling tags that aren’t reproducible in Markdown and which would normally be removed such as <video>.
Photo

show={show} that read from state and displayed the image (or not). Thankfully easier than I was dreading!
Gallery
And finally, the gallery that appears at the foot of each article. I didn’t want to reproduce the Photo component because I thought I could get away with a single modal, so I took the list of images and used map to show them all. The gallery’s state included another show variable to show the modal and this time a modalPhoto variable containing the ID of which photo to show. When an image is clicked, the state is updated so that show is true and modalPhoto is the correct ID. The take home message - I’m loving React so far. So I can now render an article. The next job is to render a lot of them so I can show them on a home page. To part three!