Building a radio (Part 3) - noise reduction
Published on: 16th January 2024
So with the code working after part 2 I added the amplifier and speakers. There was nothing complicated here; just running cables between them all and making sure that the amp had some power.
And when I fired everything up, it worked! Sort of. The sound was dominated by a low frequency hum that was annoying after a few seconds and would be unbearable after a few minutes. What to do?
Luckily I’d read something about this on a forum. Someone else had encountered this problem (to be fair, just about everyone probably has) and they solved it with a pair of audio isolation transformers. What are they specifically? No idea, but I know the basic idea of a transformer and thought it had to be worth a go. I found a couple on eBay that matched the specification I’d read about (one per audio channel) and ordered them in. For about £5 it seemed obvious to try.
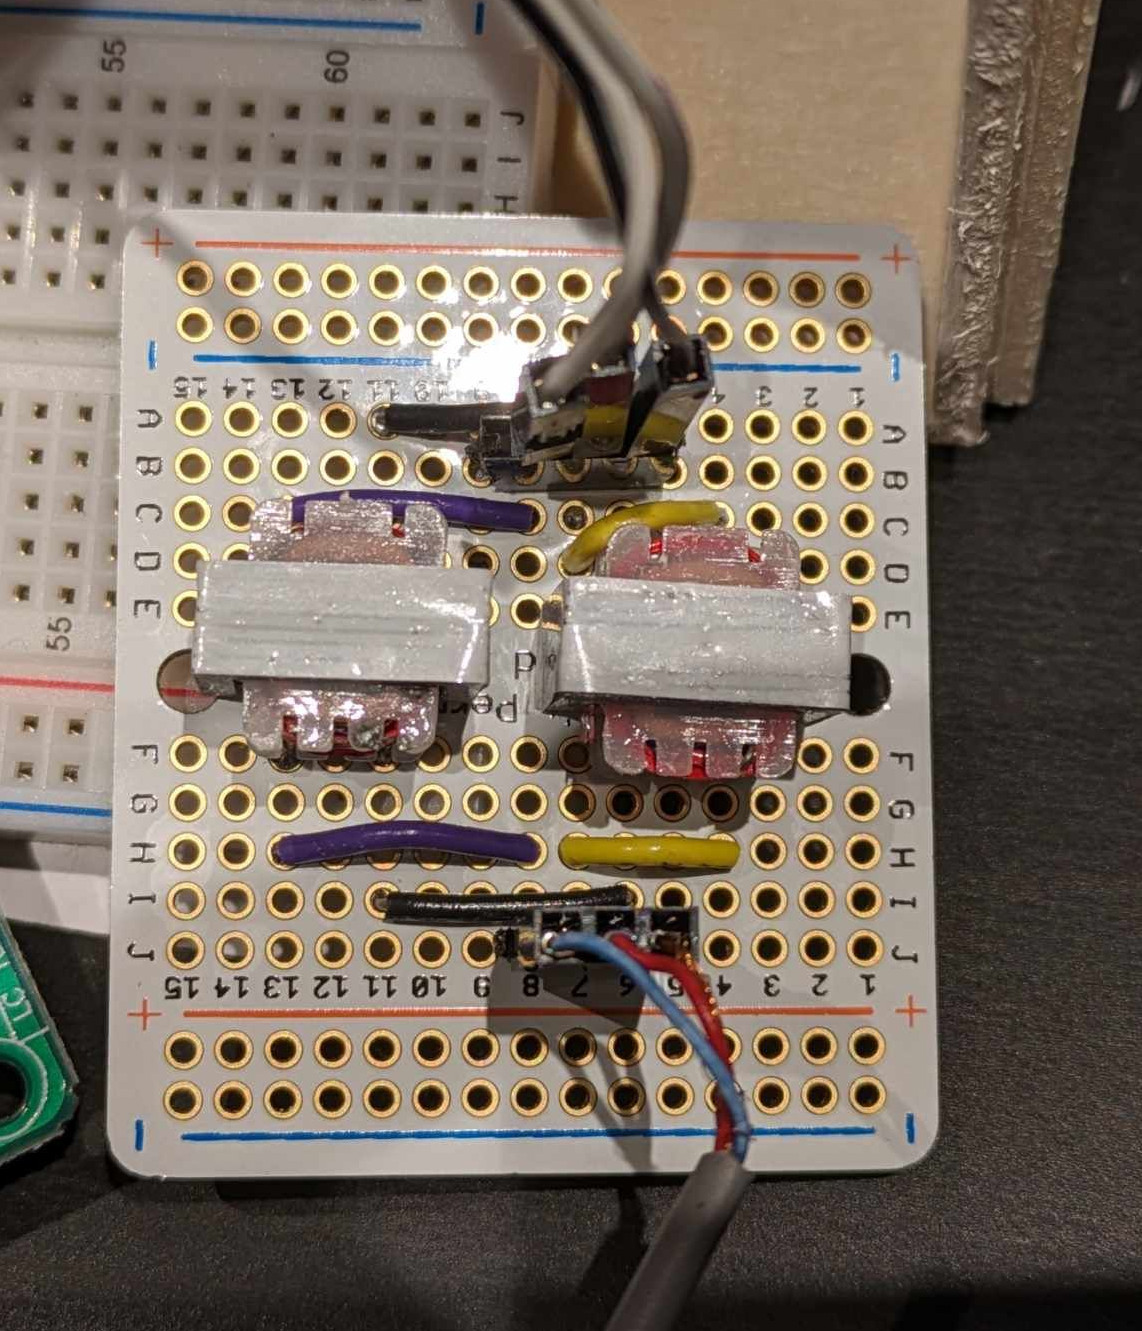
Why did I set this up on its own prototyping board? Because I thought it would be useful to have something that was transferrable and could be moved to something else in the future. I want everything to be as modular as possible so I can swap parts out as I learn things (I am hoping to learn things).